Showing posts with label Feathers. Show all posts

Wednesday, August 19, 2015

Wanda's Lone Star Wall Hanging

A little late to sharing this one as I've been so crazy busy here.  (I always say that - I'm sure it's annoying by now!)  The Husband surprised our little family with a trip to Niagara Falls over the weekend...just a quickie over night stay on the New York side.  We have gone several times to the Canadian side before they required a passport to visit...but now it would cost a small fortune for our entire family to go so - New York it is!  It was actually really fun to see the American side of the falls and there was no shortage of things to do.  This week football has started for my 9 year old and the 4 year old will be a little cheer leader.  School starts next week and tomorrow is the Husband's birthday...and of course I have to do school shopping yet and a full schedule of quilts...so as I said...BUSY!  LOL!  :)

Here is the quilt I finished up right before our mini-vacation...this belongs to my quilting friend Wanda who I met through Connecting Threadz...she is a wonderful lady and her quilting is just beautiful!  You'll have to take a peek at her quilts in her albums when you find the time...

I free handed the little swirls with disappearing ink in each of the corner blocks - then stitched over them and pebbled around them to give a trapunto look.


As with most of my custom quilting I used Bottom Line thread by Superior Threads...it is my absolute favorite thread for quilting.

Wanda provided me with Warm and Natural cotton batting...I was actually really  happy with the texture we achieved!


A little sneak at the back because I rarely show it.  I try to keep things neat as possible - but I'm human and hiccups happen.  My backs are much cleaner and neater than they were in the beginning...I make every effort to keep them as clean as the front!  This is a bit like showing my underwear in public...  :)

I really had fun with this one.  I am kind of obsessed with modern quilts at the moment but I won't deny that I adore traditional quilting.  These sort of really traditional patterns are my absolute favorite to quilt.  :)

...and I'll leave you with a photo from our trip!  If you haven't noticed...I've lost quite a bit of weight!  I'll do an update on that when I have a moment.  For now, I'm working on two quilts for my client Darlene that I know you'll love to see!


Sunday, February 1, 2015

Cindy's Sampler

Just finished another sampler for Cindy - I am really happy with the results.  :)  Lots of curved cross hatch play and surprisingly the high contrast thread on the back looks pretty  nice!


**Edited to add - there is a block on the back of this quilt that appears unquilted in the photo - I have received a number of emails pointing it out - thank you!  It IS quilted, but in taupe thread and it looks totally unquilted in the photo...it is an optical illusion!!!  LOL  I did go back immediately after looking at the photos to make sure I don't send home a quilt with an "oops".  Just wanted to mention it before I get another email!!!  ;)

Sunday, January 11, 2015

Disney Swap 2015

Yesterday I took a break from scheduled quilts to finish my Disney Quilts Swap quilt!  Despite not being perfect and having a few hiccups - I am still very pleased with how it turned out.

I wish I could say it was my very best quilting but I have learned something about myself - I work better with a plan.  I winged it with this one and if I were to do it over again I would defnitely do some things differently.  I do try to do my best with everything I make - and I tried to make this little quilt something pretty - so I really hope my swap partner likes it!

Of course I quilted a wrinkle in the back (you can bet I'll be putting the label there) and some gunk came flying off my quilting foot and I can't get the darn spot out so - I'm going to use a really professional method called "stick something over it".  LOL  I thought I had seen some really pretty 3d butterfly appliqués at one of the craft stores...I think with this being so frilly and girly it will look nice.


I have discovered I ADORE quilting satin!  It's a little finicky on the domestic - this is small so I quilted it on the Juki....even with basting the slippery satin wrinkled on me and I didn't even realize I had stitched in a nice deep wrinkle until I was finished.  The deadline is Wednesday so I just literally don't have TIME to rip it...so a label it is!  :)


I used my Derwent Inktense pencils to color in Ariel - and I actually traced this image onto the white muslin (with a few changes...it's actually a Christmas coloring page and had holly with berries and other Christmas elements to it that I removed) and just colored in the areas with fabric medium and ink.  I did go back and add black to the eyes which I'm not sure if I'm happy about or not - but there's nothing I can do about it now.  I don't think it's terrible...but I might have been better off leaving them blank and open!!!  LOL

The richness and shininess of that satin quilted is unbelievable to me.  I am really anxious to try this on the long arm with an even more intricate design.  This is a scrap that was gifted to me with a big box of miscellaneous fabric a year or so ago...so it's really lovely heavy - probably expensive dressmaker's satin.  I have toyed with the idea of quilting up some dupioni silk...but holy cow is that stuff expensive.  Until I have a really great quilt in mind...satin might be a great affordable alternative for me.  Very very lovely!  It also comes in more colors!


So this was a ton of fun.  Something different but still it has my style and taste in it!  I will take a snippet of the full package to share before I send it off.  My swap partner also likes Alice in Wonderland and Lilo and Stitch.  I bought a cute pin of Stitch when we were in Disney World back in September and also brought home some other goodies for her...while out and about today I might see if I can't find something of Alice to stick in with her little package.  :)

Happy Quilting!

Wednesday, July 16, 2014

Deanna's Quilt in Progress and Weight Loss Update

Making every attempt to finish up Deanna's quilt today so that I can begin work on Chris's quilt tomorrow.  I have four big quilts that I want to finish before school starts back up for the kids - Deanna's quilt, Chris's quilt, Bobbie's quilt, and Nancy/Barbara's giant show quilt.  It is a struggle trying to balance all things but I think I'm doing well!

Here's a progress photo of Deanna's quilt...


It's a fairly simple custom - feathers and stippling...but boy is it effective!  I'm looking forward to sharing the finished quilt.  :)  I am working on the white and pink first, quilting the entire quilt then going back and doing all the purple feathers.  I'm halfway through...I've got chicken in the crock pot and we'll be having something simple tonight so I can get to work!  :)

On the weight loss front, I'm coming along.  I've been consistently working out 5 days a week (though two of the five are just light activity/cardio) - weight training 3 days per week.  I upped my calories from 1400 to 1600-1700 per day and it's working still.  I'm consistently losing though not the 2-3 pounds per week the way it was melting off at first.  I think some of that was due to water weight, some was because I was restricting so much.  I'm losing about 1 lb. per week which is supposed to be healthy and effective for maintaining muscle and keeping my metabolism up.  Oh it's a little frustrating though I'm not going to lie!  But I do feel a lot better about what I'm doing.  I had several days where I would just break down from frustration and hunger...my body needed to eat!  :)  So while it's slower...I feel like I'm getting plenty of food and not missing out on what the family is eating at all...that makes a huge difference.  My total loss to date is 26 pounds (20 since I began really watching and working out in May) and I've lost 5 inches in my waist.  I've gone down a pant size and am almost ready to drop to the next pant size down.  I was eating super super clean and minimal processed foods...but I've kind of gone to a "if it stays in calorie range then it's fair game" attitude as I just don't think being too extreme with my diet is realistic for me in the long run.  It's probably healthier for me...but I don't know if I can maintain that kind of diet while everyone around me is having burgers and fries!  LOL!

But, frustrations and set backs aside....I'm losing!

I also have been making a few doll clothes for my middle daughter who recently got a new 18" doll...


Next I'm trying to find time to finish up some of these costumes I've been working on for Disney and I bought a bunch of really cute beads to make Frozen themed gumball necklaces for them.  LOL!  So many crafts to make so little time!!!  :)

Hope all of you out in blogland are having a great summer!

Saturday, January 25, 2014

Deanna's Quilt and a Zentangle

I finished quilting Deanna's Swoon quilt yesterday - perfect for the below zero temperatures we've been having lately!  This week is to be bitterly cold here in Ohio...but boy do these bright colors make it feel a little warmer inside...


We decided on a light/medium gray thread as it blended the best with the fabrics on the front AND the back.  There is some contrast in the white, but the neat thing is the gray reads more as shadow than thread so you still see texture.  I really like how this turned out!


I am keeping this post short and sweet tonight...because it's almost 3 in the morning!!  It's so hard to force myself to go to sleep when I've waited ALL DAY LONG for peace and quite.  LOL!  Everyone is snoozing away and I have been...zentangling.  :)


I created this zentagle-ish drawing useing my Wacom tablet and Corel Painter.  Just doodling.  Doodles are wonderful because they translate really well to quilting...and ANY form of drawing seems to help not only create designs but improve your free motion quilting skills.  Plus - it's really really relaxing.  I had been tooting around in the painter program to start learning some of the functions...I'm artsy by nature so I thought I might goof around with some graphics.  This is what I ended up with!  :)  Ok...now I must sleep!!!  :)

Friday, December 27, 2013

Almost at the Half Way Point

I am almost at the half way point on this quilt - OH MY GOODNESS!!  I cannot wait to be finished.  I have half a dozen more ideas floating in my head and I have quilts coming in soon!!!  Tomorrow is our second Christmas with my Husbands family...a day of play...then after that I have to buckle down because that only gives me one more week to finish the quilting on this.


I have been getting a lot of questions about what batting or what thread I'm using.  This is Glide thread on the top and in the bobbin - the cream fabric is mainley natural muslin - meaning there are natural imperfections in the fabric.  I like the look personally - and I like even more the idea of an elegant design over what is normally thought of as an inexpensive utilitarian fabric.  I love love love Glide thread because it tends to quilt up somewhere between a very fine thread and a thicker polyester thread...it's perfect for sort of, all purpose quilting.  You can do a lot of dense quilting without a terrible amount of thread build up or you can do really simple designs and they look very elegant and fancy with Glide's bit of shine.  I wind my own bobbins and have yet to use the magna bobbins but I hear great things about them!  I also like that Glide comes off the cone really smoothly.  I have only had one cone out of the forty or more that I've purchased from them that I had to use a thread net over.  (The price is right too - and they have one all across the board price...so I pay the same for the thread as you!  I am not affiliated - just a fan!)


I am using two layers of batting - and I prefer two layers of a lower loft batting to one layer of high loft batting.  It just gives a better more fuller look in my opinion.  Dare I say I even like the look of a "faux" trapunto look with two layers of batting and dense quilting versus real machine trapunto over top another layer or two layers of batt.  Or maybe I'm just lazy and would rather quilt the crumbs out of my quilt instead of cut away batting...  LOL!  :)


The top batting is Hobbs Tuscany Wool - I have never used this brand of wool before this quilt and I have never made a quilt this size with wool, but I do like Hobbs 80/20 quite a lot and they are very consistent so I thought it would be a good wool to start with.  I do love the fullness and the loft...but I don't like the memory retention and the sort of looseness of the batting.  When on the frame I like to poke the sides of my quilt where there is no top with pins while I am adjusting things and wool doesn't make a very good pincusion!  :)


The bottom layer is an off brand equivalent to Warm and Natural.  I have no real strong feelings about Warm and Natural either way other than to say that Warm and White tends to beard and beard bright white through my fabric so I rarely if ever use it anymore.  I honestly don't care for cotton either because I'm a machine quilter - I feel like poly and poly blends show off the quilting better and I like even more that poly batts tend to retain fold lines less.  I do however really like the look of these two batts together (wool and cotton) - though in the future to get more bang on the back I will probably layer wool with Hobbs 80/20.  Hobbs and Quilter's Dream have been my two favorite battings so far...and both are pretty economically priced.

Alright, happy sewing!  Hopefully I'll be DONE next time you hear from me!!!  :)

Thursday, December 26, 2013

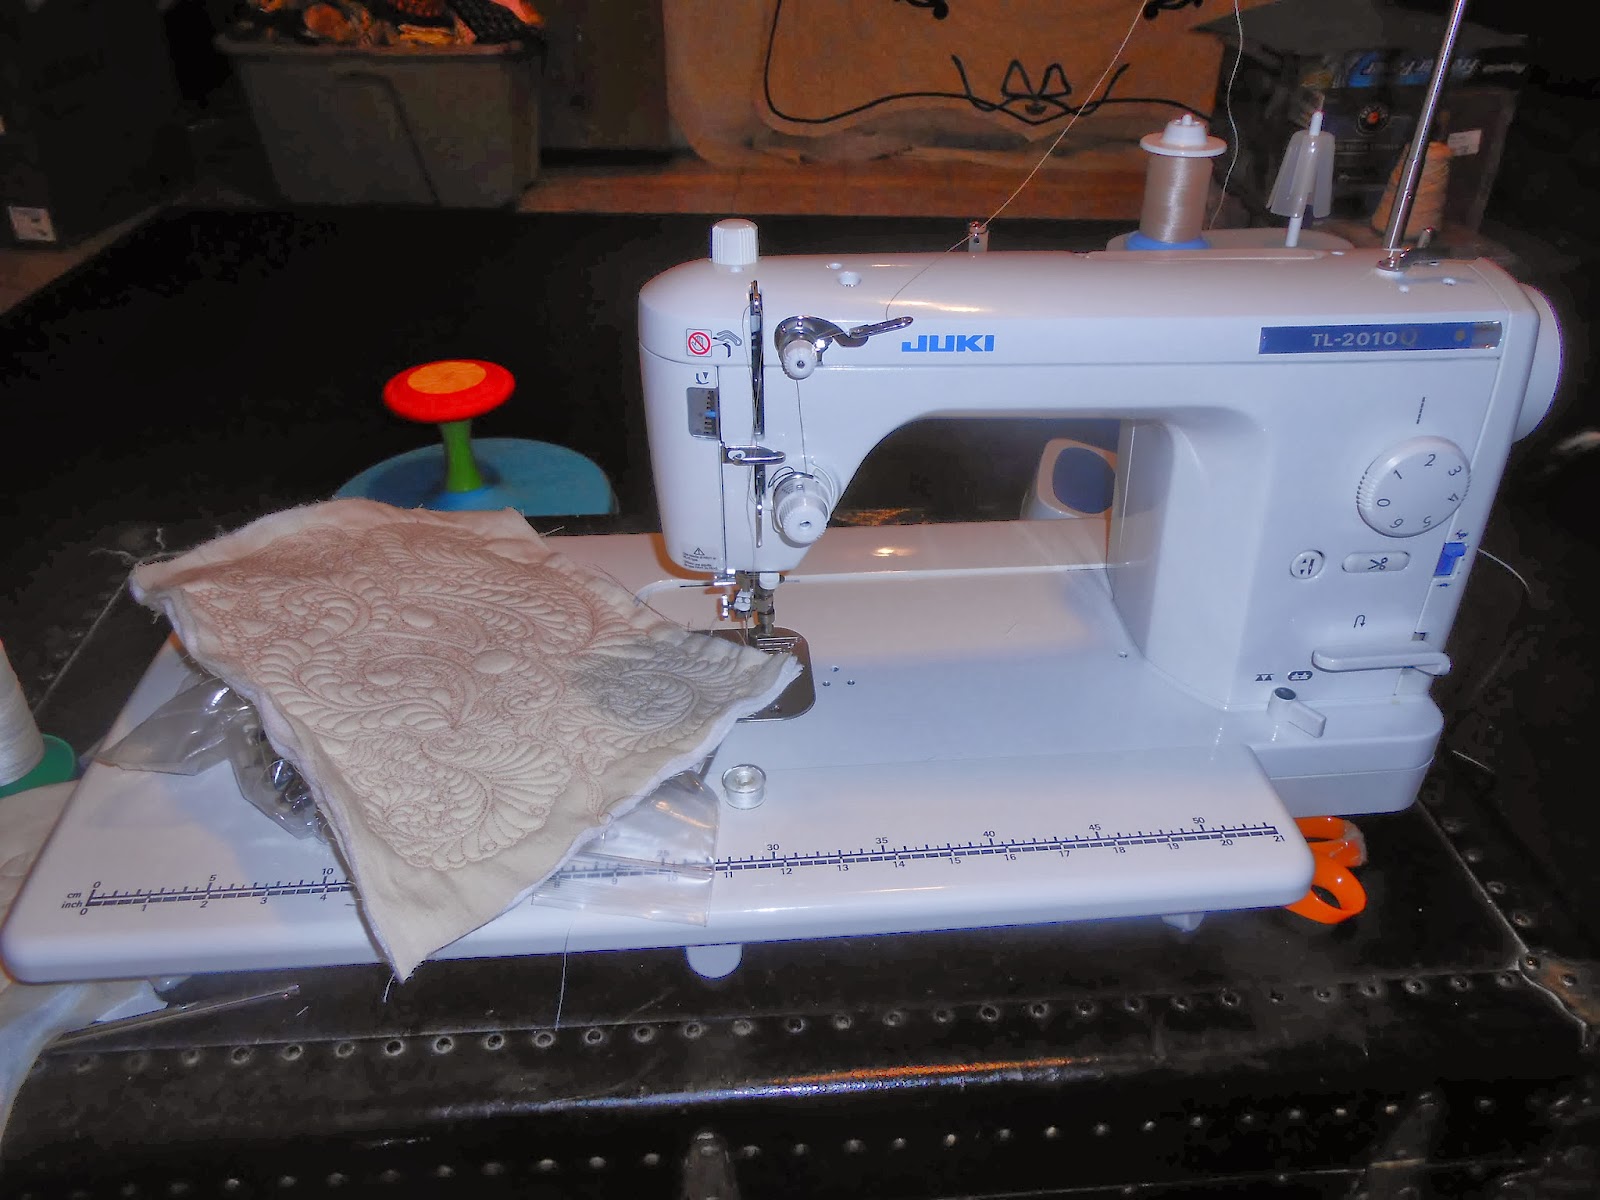
Free Motion Play on My New Juki!

Happy day after Christmas!!!  I hope everyone had a wonderful day yesterday, even if you don't celebrate.  It was so great here, family - food - and goodies!!!  I was FINALLY able to open my Juki...I gotta say that was a TOUGH wait!

I needed to make up a sample to paint before I attempt painting on my "vintage charm slash wedding quilt" and well, what better time to play with my new toy!  I'm using Robinson Anton thread that came with the machine, two layers of low loft Quilters Dream poly batt, and muslin.  Just scraps from the stockings pretty much.


I want to say the Robison Anton seems to sew up a lot like Glide...but this is the only experience I've had with it yet so I can't really say  much more.  I like it a lot though, and being a huge Glide fan (still haven't tried magna bobbins though) I think I'm going to like this thread.  


The coins turned out really cool and are WAY easier when I can slow down with the Juki versus on the long arm!  LOL

Below is some of the thread I got with the machine...plus one more that is on the spool pin.


Ooooh and there she is!  My Juki!  She needs a name I think ... she's a lot younger than Eunice so I think she needs a younger name...I'll have to think on it!  LOL


OH!  One more goody the Husband bought me...I have been wanting this book forever!!!  It is out of print and kind of difficult to get your hands on because quilters tend to hang on to it.  I have never spent so much on a book and outside of Cindy Needhams Linen Quilt book I don't think I will again...but I had to have this for my collection and I love it.  My Husband even got ahold of Karen and asked her to send me a Christmas card!  LOL!  She is so super sweet, she obliged him and it was kind of exciting to get a card from one of my quilting super heroes!  :)  LOL  I will save it forever with the books for my children.


Alright I'm off - just had to share.  I have a TON of work to makeup after being off for so long and goofing around the last few days!!  :)  Hope you all are getting some sewing done out there!!

Wednesday, November 20, 2013

More Progress on Stockings and Laura's Quilt

Making more progress on my stockings.  This is one I am working on this afternoon while the baby is napping...


The last of the customer quilts for the year is being shipped off shortly...and I'm looking forward to working on some of my own projects over the holidays!  My first goal is to get these stockings finished.


This is the first stocking and to the right, the reverse side.  I decided I am going to just do all three stockings backs with feathers...and each front will be a different design.


Above is another shot of the backing of stocking one. I just can't get enough feathers I tell you!  :)

I also finished up Laura's quilt yesterday...it is a very special quilt.  I'll let her share the story on her blog...but it truly moved me to tears.  What a beautiful quilt and what beautiful friends you have Laura!


I really really love ribbons...if I get some time here in the coming weeks I'll show you how to quilt them.  They are very simple but they are so cute and sweet!  I thought they complimented the fun whimsical nature of this quilt.


So much to do and so much to say!!  I want to get in as much sewing time over the next few weeks as I can so I am going to run.  This is truly a magical time of year...I hope you all are enjoying family and preparing for the coming holidays!  :)

Saturday, March 9, 2013

Free Motion Quilting - Bump Bump Feathers

I love bump-bump feathers.  I have practiced many different styles, but for traditional looking feathers these are my absolute favorite.  I have been promising a video on how I make these, and I will get there!  Until then, here's a little tutorial to show how I make them.


Almost any quilting design I'm going to create I practice on paper first.  I drew HUNDREDS of feathers before I was able to quilt them.  These are not the kinds of feathers I made when I was starting out, but I've found that bump bump feathers are much easier to control the direction, flow, and shape of.

First I draw curving line.  This is going to be the spine.  You'd think you'd want to start at the base, but I prefer to start at the top of the spine.  The top curve will eventually become a feather plume.


Because I began the spine at the top, I can begin making my feathers at the base of the spine.  I find that it's easier to travel from the bottom up.  This is personal preference, I have seen a lot of quilters who start from the top down, or from the bottom up then trail back down the left side from the top.  Not me, I like to start at the bottom on both sides!  I just feel like I have more control of the shape of the feather this way, and better visual of what I've already done.


Without lifting your pen, practice creating feathers all the way up the right side of the spine.  Make your first feather, then travel up the spine just a bit and create your next feather.  NOW is when you're going to bump back over the round part of the plume of the feather you just made to create another feather....bring that new feather back to the spine and do it again until you reach the top of the plume.  See below how I took that top section of the spine and made it a feather?


At this point I might even go so far as to create another plume as I have done below.  It just depends on the shape the feather is taking on.  All feathers will come out a little different, though you do have some control over the shape and direction so you can achieve some uniformity.  Next, if I don't want to accumulate thread down the spine, you can echo back down the feathers to reach the base  of the spine.  This is especially effective when used with micro stippling or continuing the echo to create an almost, trapunto effect.  Now, here my echo is very wide to account for the arrows and writing.  When quilting, generally my echo would be much tighter and closer to the plumes.


Now travel back up the other side and repeat.


Again, if you choose, you can echo back down the other side.


My other favorite and very traditional feather is a curling bump bump feather.  Here I show you how I create this feather without echoing.  Now remember, when you quilt this, your spine is going to be more defined because you'll have trailed back down it with thread.  Here I've used pen, so you can see some of the back tracking, but it will be more evident when sewing.  You'll want to choose your thread accordingly.  I like to use a thin thread like Superior So Fine! when attempting to create shadow and definition...but if I want to see the thread I might use something like Glide.


Again, you start at the top where the curl will end.


Trail up the spine of the feather just as you did in the first feather.


Once you reach the top of the feather, either echo back down the outside of the plumes, OR, trace down the spine of the feather.  Once you reach the base, just as you did in the previous feather, work your way creating plumes back up the opposite side of the feather.


When finished, your feather will resemble something like this!  Of course everyone's feathers has their own bit of flair and style to it.


Or you're welcome to send me your quilt and I'd be happy to feather it silly for you!!!  ;)

Have fun making those feathers!