Showing posts with label Custom Quilting. Show all posts

Friday, September 11, 2015

My Design Process and A Few Quilts Too...

I have been really slacking in the quality blog post department, for that, I apologize!  You can really tell when I get busy around here because my posts become more "show and tell" than posts.  Well, I'm not lacking in work - and that is a true blessing - but I do want to make an effort to share a little more about my process here.

When I talk to a potential client for quilting it generally begins with a photograph.  Sometimes that photo is after the quilt is in my possession, but because I work from home and have very little open space for photography I love when folks send me a photo before hand.  Here's a photo Darlene sent me of her Seven Sisters quilt when she asked me to quilt it for her:


The next phase in the process for me is planning design.  Sometimes an idea comes to me right away - maybe I see something in the patchwork and know a quilting element that will really work well immediately.  Other times I scour books, magazine, the internet, or my own past work for inspiration.  Even more frequently I take that photo and simply play with ideas until I get hit with something that works.  Something that is REALLY important to me is to come up with my own designs.  I may borrow elements or draw from others, but I want my own work to be unique to me.

 That was really the case with this quilt of Darlene's...she always brings me the most unique designs.  I played this one for quite a while before something I really liked hit me.  If I'm really lucky - my clients like the idea too!


I use a Wacom Bamboo tablet to draw my designs onto the photograph using software that came with the tablet set.  If you do a lot of custom work it is a fantastic tool.  There are times when something I've drawn up doesn't play well when I actually get to the quilting - so I do try to leave some room for changes.  Lucky me this time everything went very smoothly!  Here's the finished quilting - not a wonderful photo I'm afraid because I took the photo late at night just to have a few before I sent the quilt home early the next morning.  In a perfect world all of the quilts I work on will have a photo shoot before they go home.  :)


I shared this quilt belonging to Wanda in my last post but I'll show you how I used this process for her quilt too - and do so for just about all of the custom quilts I work on.


It REALLY helps me to envision the quilting before I quilt it.  Planning each and every quilt can be tedious but it is tremendously helpful in not only communicating design to clients, but also seeing how things will actually look before I sew a single stitch.  I admire folks who can load a quilt with no plan start to finish and come up with something amazing - but that method just doesn't work for me!  I have way fewer "oops - that doesn't look very good" moments if I know ahead of time to some extent what the quilt will look like.  You can get an idea of what will work with the actual pieced design and what will not.

I never realized until now how fun it is either just to sort of see the before and after photos side by side!  I'm going to have to do that more!

Now something to really watch out for...is to be sure you can execute the designs you come up with.  Since you are "just drawing" on the computer it is very easy to get carried away...or forget the actual size of the patchwork you are dealing with and create a design that is ridiculously intricate.  This sort of happened to me with Jane's Dear Jane quilt:

 When I drew up the design for this quilt I wasn't thinking about the fact that her gray sashing was only about 1" wide by 6" finished...or something close to that.  Whoops.  She gently reminded me in an email and we decided to go with the intricate design despite the small sashing because it just worked so well.  But definitely creates a lot more work than it seems in real life than on a computer.  (I'd like to think the finished product was worth the extra effort!)

I have some more amazing quilts in store for you in upcoming posts.  I cannot believe some times the quilts people send to me - they are fantastic and so very beautiful!  I truly love my job!


Wednesday, August 19, 2015

Wanda's Lone Star Wall Hanging

A little late to sharing this one as I've been so crazy busy here.  (I always say that - I'm sure it's annoying by now!)  The Husband surprised our little family with a trip to Niagara Falls over the weekend...just a quickie over night stay on the New York side.  We have gone several times to the Canadian side before they required a passport to visit...but now it would cost a small fortune for our entire family to go so - New York it is!  It was actually really fun to see the American side of the falls and there was no shortage of things to do.  This week football has started for my 9 year old and the 4 year old will be a little cheer leader.  School starts next week and tomorrow is the Husband's birthday...and of course I have to do school shopping yet and a full schedule of quilts...so as I said...BUSY!  LOL!  :)

Here is the quilt I finished up right before our mini-vacation...this belongs to my quilting friend Wanda who I met through Connecting Threadz...she is a wonderful lady and her quilting is just beautiful!  You'll have to take a peek at her quilts in her albums when you find the time...

I free handed the little swirls with disappearing ink in each of the corner blocks - then stitched over them and pebbled around them to give a trapunto look.


As with most of my custom quilting I used Bottom Line thread by Superior Threads...it is my absolute favorite thread for quilting.

Wanda provided me with Warm and Natural cotton batting...I was actually really  happy with the texture we achieved!


A little sneak at the back because I rarely show it.  I try to keep things neat as possible - but I'm human and hiccups happen.  My backs are much cleaner and neater than they were in the beginning...I make every effort to keep them as clean as the front!  This is a bit like showing my underwear in public...  :)

I really had fun with this one.  I am kind of obsessed with modern quilts at the moment but I won't deny that I adore traditional quilting.  These sort of really traditional patterns are my absolute favorite to quilt.  :)

...and I'll leave you with a photo from our trip!  If you haven't noticed...I've lost quite a bit of weight!  I'll do an update on that when I have a moment.  For now, I'm working on two quilts for my client Darlene that I know you'll love to see!


Friday, July 24, 2015

Modern Dear Jane in Progress

Today I'm finishing up chores around the house and spending the day working on Rusty's Dear Jane...it is so very modern and bright!


I am using one layer of batt provided by Rusty - I believe it's Hobbs 80/20 - Glide thread for quilting.  I thought about using monopoly in all of the color patches but I'm not a fan of the shine it creates.


After working on these blocks (I believe there are more than a 100 of them) - I think I'll be able to get away with solid black only.  I am loving this quilt...I have never wanted to make a Dear Jane so badly as I do now after seeing it in this rainbow colorway!


*cough cough*  Just a reminder that I may have something to help you make your own rainbow quilt...

https://www.etsy.com/listing/241447170/kona-cotton-solids-skinny-strips-roll?ref=shop_home_active_7
Kona Solids Skinny Roll - $24 ($4 shipping anywhere in the US)


Psssst...also if you follow me (pumpkinpatchquilter) on Instagram - you'll find a code for free shipping!

Thursday, July 16, 2015

Cheryl's Sew Spooky - Finished!

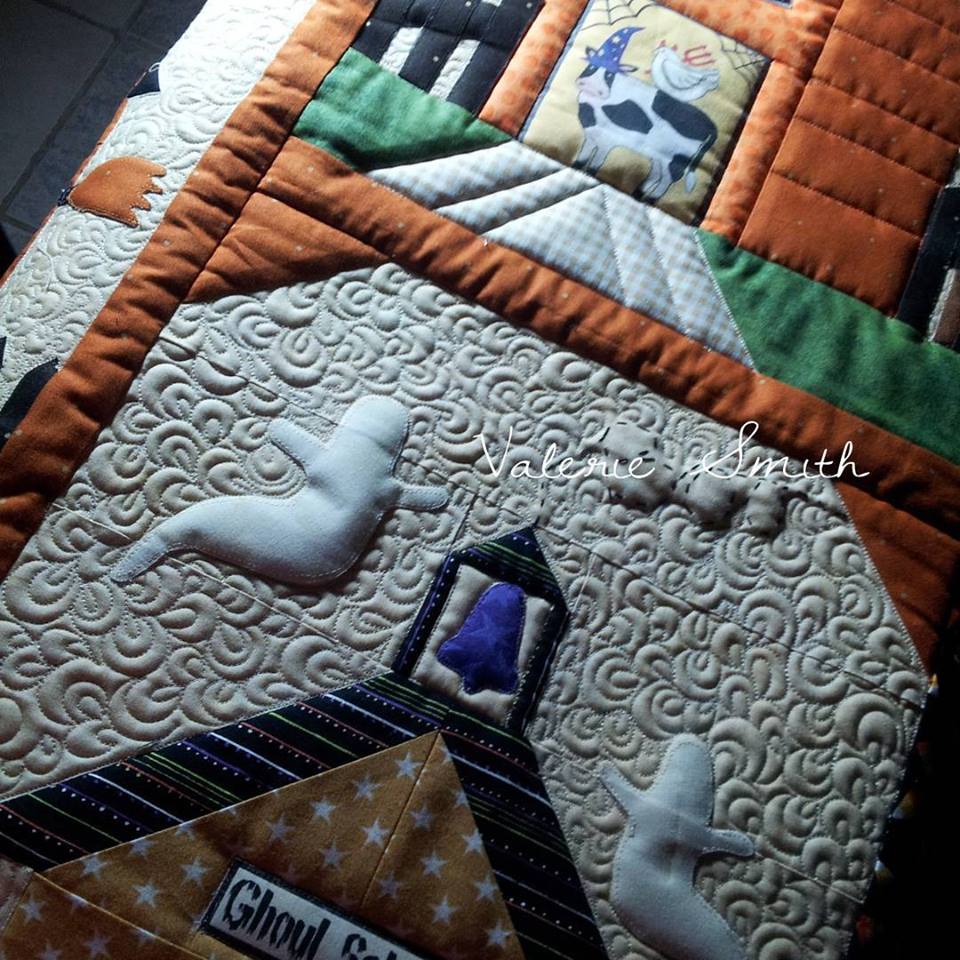
Woohoo!  My third Sew Spooky quilt is on the books, I had a great time working on this.  I kind of thought I might get bored only because I've quilted it so many times - but I really didn't!  I had a lot of fun!


I think part of the fun was in thinking up new designs for blocks I have already quilted.  I love the design process.


At Cheryl's request I used double batting (and I am so glad she asked because I LOVE the definition of double batting) - it really helped fill the appliques with little or no quilting.  Love this look!

I used Glide thread in black, orange, and a tan color called "wheat" for the entire quilt.  The majority of the ditch work was with "wheat".


I really love diagonal lines - though of course you need to space them as accurately as possible, I think with a quilt like this with an almost folk art feeling, I didn't worry if they weren't absolutely perfect.  Just neat and not distracting...my goal was to give this quilt life with textures - not just quilt it o death.

I think it turned out great!  I love this quilt!  

I am catching up on emails over the next week - I found about a dozen stuck in my spam folder, so if I didn't reply to yours I apologize!  I have some big exciting things happening over here that I'm thrilled to share with you...I've been quiet I know, but absolutely working the entire time!  :)


Wednesday, February 25, 2015

My Favorite Rulers and Some News!

Oh this is going to be a jam packed blog post - and I'm going to try and not get TOO long on you - but you all know I rarely have a shortage of things to say on any given subject!  :)

First I have two important things I want to share - probably the biggest thing next to baby happening in my life right now...is that as of yesterday I am the owner of a "new to me" APQS Millennium that will be arriving in about a week!  Woohoo!  So that much desired stitch regulation along with quite a few other bells and whistles are soon to be in my reach!  :)  I will elaborate on the story in another post - but very much wanted to share the exciting news with my quilting pals!

Second, I wanted to share that author, teacher, and award winning quilter Karen Neary shared a very kind post on her blog about the quilting I did on Darlene's New York Beauty quilt!  Karen is the designer of the pattern called New York Roundabout Again - and a while back Darlene had tested the pattern for her.  I am honored to be the one who was able to work on this beauty...and so very flattered at the kind words Karen had to share about my work!  Definitely stop by her blog and check it out!

Sew Karen-ly Created
http://sewkaren-lycreated.blogspot.com/2015/02/eye-candy-for-quilters.html

Ok!  Now with the fun news shared - many of you have been asking me about RULERS!

-------------------------------------------------------

Long arm rulers (often referred to as templates) are as much like candy for quilters as thread!  For the past two years I have been having a blast using rulers on my Ultimate 1 - without stitch regulation and with the older APQS style spoon foot.  It has taken some practice but I am convinced no matter what machine you are quilting on you will want to take some time to experiment...but it is SO worth the effort!

I am going to share with you my MOST used rulers...in descending order as to HOW frequently I use them.  There are just TONS of options nowadays for long arm rulers and new ones are popping up all the time...so keep on the look out for new ones!

Ditch Ruler from Quilter's Rule
My absolutely MOST used ruler is - the ditch ruler.  This one is made by Quilter's Rule and is just your average ditch ruler.  This one just happened to be available to me - I believe I purchased it from a vendor at the Sewing and Quilt Expo in Cleveland the year I bought my long arm.

The groove along the edge of the ruler is for your machine foot.  The straight edges of the outer ends is lined up with your "ditch" seam, and then you guide your foot along the edge within the groove.

Now - that's how you're supposed to use the ruler, but I'll be honest, I never do.  Why?  Not because I'm lazy...but because even the best piecer's don't necessarily sew a perfectly straight seam.  So a ruler like this doesn't allow for womples!  LOL  I like this ruler because I don't like to use most rulers from edge to edge...and I feel like the center most portion of the ruler is what I use the most.  Like with all things it takes getting used to - but I probably use this ruler on just about every quilt that comes to me!

Here's a video I took recently of me using the ruler on my APQS Ultimate 1...be forewarned that you may have to open this video in another window or view directly through YouTube for it to be viewed properly.


-------------------------------------------------------

Judy's Applique Gem from The Gadget Girls
My second most frequently used ruler is Judy's Applique Gem from The Gadget Girls.  This ruler literally changed the way I ditch around appliqué.  Now - this could have something to do with not having stitch regulation...most appliqué rulers were very difficult for me to use - this was the only ruler that really  helped me get up and close with unusual shaped appliqué.  I use this on ANY and EVERY quilt that has appliqué elements!

-------------------------------------------------------

12/13" Arc Ruler from Quilts on the Corner
My next most frequently used ruler is my 12/13" arc ruler from Renae Haddadin's online store, Quilts on the Corner.  She has full sets of arcs that I have just yet to invest in - but this one in particular is sold on it's own and EXTREMELY useful.  The inner arc is 12" while the outer arc is 13".  I use this one for almost all of the curved cross hatch I do no matter the size, and lots of other curved stitching.  While every quilt doesn't require a ruler like this, it is definitely one I could not live without!  The design possibilities are really immense with this ruler!

Here are photos of some recent client work where I used this same arc ruler to create curved cross hatching:

Curved Cross Hatching on Client Cindy DeUnger's Quilt - Created with 12/13" Arc Ruler

Curved Cross Hatching on Client Darlene Gerber's Quilt - Created with 12/13" Arc Ruler

-------------------------------------------------------

QP Curve Template #10 by Linda Hrcka from The Quilted Pineapple
This ruler is new to me but I am finding more and more uses for it.  I purchased it directly from Linda, but I see she has an online shop now - and if you are not familiar with Linda's work you SHOULD BE!  Visit her blog The Quilted Pineapple and I promise your won't regret it!  

Because this ruler has a half circle/moon shape unlike any of my other rulers I have found it to be extremely useful.  In the short time I have owned it I have already used it on several quilts.  I use this for circular appliqué, swags, and curved cross hatch.

This is a larger ruler than I normally work with.  Generally I prefer smaller rulers because of the awkwardness and difficulty to handle large rulers.  The way I have found I use this ruler is to mark first - then use the shape of the ruler to stitch along the pre-marked shape.  I anticipate this is going to become one of my "never let it go" rulers!

Here is an example of a recent client quilt where I used this ruler to create a swag design:

Swag Quilting Design Using QP #10 Template - Client Joyce Coburn's Quilt

Swag Quilting Design Using QP #10 Template - Client Joyce Coburn's Quilt
-------------------------------------------------------

Creative Grids 1" Ruler - NOT a Long Arm Ruler

Now this last ruler is NOT a long arm ruler/template.  The difference is the thickness.  Long arm rulers are generally about 1/4" thick to accommodate our machine foot.  You would never want to use a traditional cutting ruler on your long arm except for marking.  That is exactly how I use this ruler.  I thought it was worth sharing because it is absolutely invaluable.  I use this for measuring out small sections to quilt or creating geometric shapes.  I also use this to create registration marks for creating feathered borders (something I do frequently) or just lining up shapes and designs so they are neat and straight.

This one was actually gifted to me from the owner of a local quilt shop in exchange for some work I did.  I'm so glad I have it because I use it ALL the time!

-------------------------------------------------------

Some Things to Note and A Few Resources:

- Long arm rulers are THICKER than regular cutting rulers.  You never use a cutting ruler on your long arm as it could slide under your foot and cause damage to your machine or YOU.  That does not mean you won't LOVE traditional rulers for marking...and using them in combination with a good long arm template for carrying out your design.

- There are absolutely TONS of people who sell long arm rulers.  Do a quick google search and be sure to check at your local shows - particularly ones that will have long arm dealers with machines to test.  A great place to start is with the brand of whatever machine you are long arm quilting on.  Handi Quilter in particular has many rulers available that can be used on any long arm.  Also many of your favorite quilting artists and teachers have rulers available for purchase (Jamie Wallen, Lisa Calle, Deloah Jones, Linda Hrcka/The Quilted Pineapple, Renae Haddadin - just to name a few).

- Using rulers on a sit down machine is possible!  The way that free motion quilting has taken off with quilters on their sit down and domestic sewing machines - now is ruler work!  There are a number of great online resources to get you started with this technique, but a wonderful place to start is Patsy Thompson's YouTube channel.  She is an author and teacher who also has some wonderful free motion quilting tutorials and classes available.

- If you subscribe to or can get your hands on the latest issue (March/April 2015) of Machine Quilting Unlimited there is a fantastic article by Margaret Solomon Gunn on curved templates with some great examples of how to use them creatively.  Just another resource available to get you going with long arm rulers!

-  This is really just the tip of the ice berg in terms of what is available out there.  I do have many more rulers all of which I use some...but those shared above are my absolute use every day - cannot get by without them rulers!  :)

A Fine Example of My Lack of Organization - Ruler Storage

-------------------------------------------------------

I think this is a good starter list of the rulers I use the most!  If you have an absolutely "I can't live without it" long arm ruler I'd love for you to share!  I am always looking to add to the collection!


Thursday, December 4, 2014

Monica's Christmas Quilt

I finally finished Monica's 12 Days of Christmas quilt!


I am so happy with how it turned out!  Next on the frame is Cindy's scrappy BOM!  :)

Saturday, November 15, 2014

A Few More In Progress

 I am just having such a good time with this one that I thought I'd share a few more photos of the progress.  I've moved along farther down in the quilt but the appliqué is finished in this one and it looks so nice.  :)  Next photos of the finished quilt! ;)


Thursday, August 21, 2014

Roseville Album Progress and a Little Exciting News!

I just wanted to pop in and share a progress picture of Barbara's Roseville Album quilt.  I've actually advanced the quilt and made a dent into the next border below this but it doesn't look very impressive anymore so I thought I'd share this one!!  :)  I still have to turn and do the side borders but most of the stitch in the ditch is finished so - I won't say that it will go quickly, but it will go quick-er.  :)


I'm hoping to have a "finished" post ready for next week!!  Cross your fingers for me that all goes smoothly - boy oh boy I've had just a million things make this quilt take longer than it should have!!  Including another motor brush change.  Wheew!

My exciting news to share...is that the next project that just arrived to my little in home studio a few days ago is top secret!  I will not be able to share any photographs - but what I can share is that it is planned to be included in a book written by my friend Lara from Buzzin Bumble!  I don't want to give away too much but I can tell you that it is going to be amazing - you better go visit her blog (and follow her too!) so you can keep up with all of her quilty happenings.

School starts next week and hopefully I'll be able to find some time to update on my diet/health kick progress!  I'm still hanging in there - though I've slacked off a little and gained a couple of "pizza pounds" back.  But I'm a work in progress right?

Happy Quilting!

- Valerie :)

Wednesday, August 13, 2014

Billie's Sew Spooky Quilt - Finished! :)

A few pictures of Billie's Sew Spooky quilt all finished up...


Eeep!  I really love how it turned out!

Loading up Barbara's Roseville Album to finish up.  I had to take a break from it as it was SO big and SO intensely quilted!  Lots and lots and lots and lots of stitch in the ditch - AH!  I'm feeling excited and motivated to get back to work on it though - remarking a few areas and then I'll share some more pictures.  It is just about finished -just a few borders left to do.

Such a nice cool day today - it's feeling like fall!  That means coffee and quilting...  :)

Happy Quilting!

- Valerie